|
|
|
==================
Creating Custom Macros
There are many possible macros to save you tons of typing and time, streamline the game and get your crit out of trouble fast.
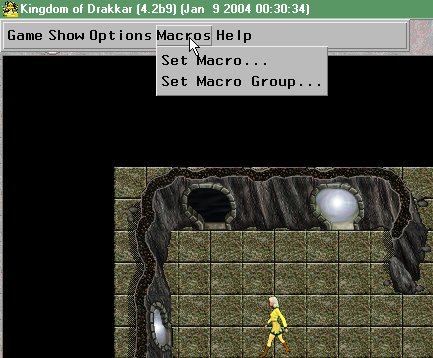
First, slide your mouse to top left of the screen.. that will make a toolbar appear. Then go to Macros.. Set Macro...
|
|
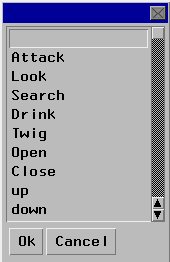
This should appear:
|
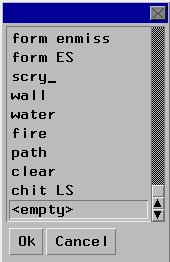
Choose <empty> from the bottom of the list.
|
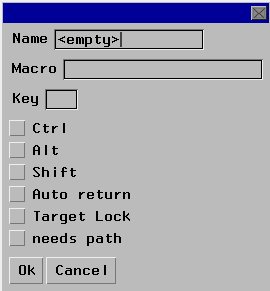
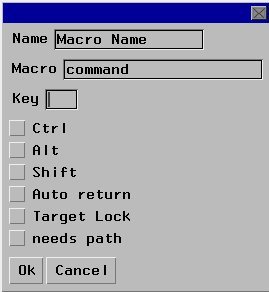
You will now see this:
|
|
|
Give your macro a name.
Fill in the command line. Assign a key. Assign which key to hold down with the activation key(if any). Check appropriate box for how the command will be acticated.
Click Ok Test it to see if it works. |
==================
Tips
All game commands can be put into macros. Don't use any letter keys, number keys or any other that you would use in normal conversation without checking ctrl or alt in the macro creation panel. Shift should only be used with F keys or others not normally used in conversation. k is system default, so don't use for anything. Be careful to keep a record of what keys you have used so you don't use the same one twice. Here is how I do it.. Macro Chart Don't name your macros after default macros. Neither will work properly. You can put up to 3 commands in a macro with ; in between them.. take bottle from sack; drink bottle; drop bottle ****** Many commands and terms can be shortened such as b for berserk and bot for bottle. You can add a yell to your command using the @ symbol. eg - b@ZERKING!!! is the command to zerk up and yell ZERKING!!! at same time. ****** You can add any of your custom macros to your macrobars. If you forget what key you have assigned a certain task, just choose it from the Set Macro list to have a look.
|
======================================
italics represent placeholder - replace with actual name
| Name | Format | Setting | Purpose |
| trade | trade enable | Autoreturn | allows you to pass/receive items.. saves typing it all the time |
| Steal left | drop left; steal from | target lock | keeps a hand empty while skilling |
| twig home | belt right; wield twig; drop right | Autoreturn | empties a hand and gets you home in a hurry - always have a home twig in left slot in belt |
| bank out | name, withdraw 500000@out | Autoreturn | places 500k on counter and tells recipient it is there |
| bank in | name, deposit 500000@in | Autoreturn | quickly deposits all coin on counter and signals it is done |
| appraise | name, appraise itemname | Autoreturn | value of rings, bracers, helms, ammies can tell you what they are |
| train | *train 0 ## $$ | Autoreturn | train at any trainer.. ## = skill code $$= amount |
| assess | *assess 0 ## | Autoreturn | assess skill at any trainer. you will need 50 coins in sack |
| drink_ | *drink | Autoreturn | IH when you have a free hand |
| IH | belt right; take bottle from sack; drink bottle | Autoreturn | to IH when you don't have a free hand |
| rewield | drop bottle; wield weaponname | Autoreturn | drops bottle and replaces with weapon |
| fountain | drink fountain | Autoreturn | +10 str at rb fountain.. must wear sash.. good for resting barbs |
Class specific macros |
|||
| Name | Format | Setting | Purpose |
| zerk | b@message | Autoreturn | zerk and yell (barb) |
| arg | arg | Autoreturn | forces OOC round so you can AB (barb) |
| zerkdrink | get bottle from sack; drink bottle; break bottle | Autoreturn | seems to work better than default drink (hally/gs barb) |
| self heal | form heal at ownname | Autoreturn | best to set to single keystroke (healer) |
| home | form teleport home | Autoreturn | set TP named home in every zone and set as single key stroke {ment} |
| invis self | form liminv at ownname | Autoreturn | set as single key stroke for vanishing quickly{ment/thief} |